
Newborn Photography Retouching: AI-Powered Workflow Guide
Newborn photography is all about preserving those first, fleeting details — tiny fingers, soft expressions, and the realness of being just a few days old.
Because babies arrive with all kinds of natural variations — dry patches, slight redness, soft peeling skin- retouching can help gently refine the image that will make it a forever keepsake for parents. Now isn’t that what being a photographer is all about?
Whether it’s softening uneven tones, minimizing temporary marks, or cleaning up backgrounds to keep the focus on the baby, soft newborn retouching supports the story you’re already capturing.
In this guide, we’ll walk through a workflow built for pros: quick, clean, ethical edits that keep your style intact and your turnaround tight. Let’s get into it.
TL;DR: The Newborn Retouching Sweet Spot
Newborn retouching walks on a fine line. Too little, and parents notice every flake. Too much, and suddenly the baby looks plastic.
But when you blend AI with manual precision, you get the best of both worlds:
✅ Natural skin that still looks like skin
✅ Faster turnaround times
✅ More energy for the edits that actually matter
It’s time to drop your worries because AI isn’t replacing your style, it’s supporting it. With the right mix of manual + AI delegation in your workflow, you can keep your edits soft, honest, and human… without burning out. This guide shows you how to build that workflow so your gallery feels effortless, authentic, and always client-ready.
Before we get started, check out these 8 Newborn Photo Editing Tips to help you stay ahead of your delivery timeline
AI + Manual Retouching: Finding Your Workflow Sweet Spot
Retouching newborns takes a light touch and a lot of repetition. A manual process makes it tedious. You need to clean up what doesn’t need to be there, across a whole gallery!
Flakes, blotches, redness — you fix one thing, and suddenly you’re deep in a 40-image gallery wondering if you went too far… or not far enough.
That’s where a hybrid workflow shines. Let AI handle the heavy lifting, then step in where your eye and style matter most.
- AI gets you 90% there. It smooths out the distractions (like dry skin or redness, removes background distractions or objects quickly and consistently across your gallery. No more repeating the same fix 40 times.
- Manual edits take it home. That last 10%? That’s where you fine-tune the details. Maybe you clean up a hand, fix a distracting fold, or adjust the light just right on the baby’s face.
The pros aren’t just dabbling with AI, they’re building entire workflows around it to save time and focus on what actually matters: the creative work.
The good news? It’s never too late to start. Tools like Aftershoot help you:
- Preserve the natural skin on newborns instantly
- Achieve consistent edits across your gallery
- Deliver photos faster without the burnout (and makes sure parents come back for their second-borns 😉)
“Aftershoot’s AI Retouching has massively cut down my editing time, especially for newborn skin. From the very first use, I knew it was a game changer. It’s super intuitive: pick a preset, tweak a few sliders, and boom — perfect skin.” Ricardo Tavares
It’s not about giving up control, it’s about freeing up your time so you can focus on the finishing touches that actually need your attention.
💡 Curious how Aftershoot’s AI Retouching works to keep newborns looking precious as they are? Explore all retouching features
Common Newborn Retouching Mistakes (And How to Avoid Them)
These mistakes can add hours to your workflow or worse, chip away at the authenticity of the final gallery. The good news? There are easy fixes once you spot them.
Here’s what to watch for and how to tighten things up:
- Is the skin smoothing too much? Happens. Dial it back. Leave a bit of texture so their skin still feels soft and real. Use AI to do basic skin clean-ups
- Does the background look cluttered? That tiny wrinkle in the backdrop or fuzzy prop thread? Your eye might gloss over it, but it’ll stand out in the final image. A patch tool or object removal tool goes a long way in removing these distractions, so your photos come out flawless.
- Do you need to edit out every flake or vein?Nope. A little redness or flakiness is part of being brand new. Clean up what’s distracting, but let the realness stay.
- Do you feel your gallery is a little all over the place? Not editing shot by shot without a baseline makes it easy for tones and skin softness to drift. Use batch edits or an AI to sync settings and keep things consistent, then fine-tune where needed. It’ll save you time and make your gallery feel intentional.
Step-by-Step Newborn Retouching Workflow with Aftershoot
This is where your retouching starts. Let’s begin
Step 1: Import Your Newborn Photos
Import/Select the images you want to retouch.
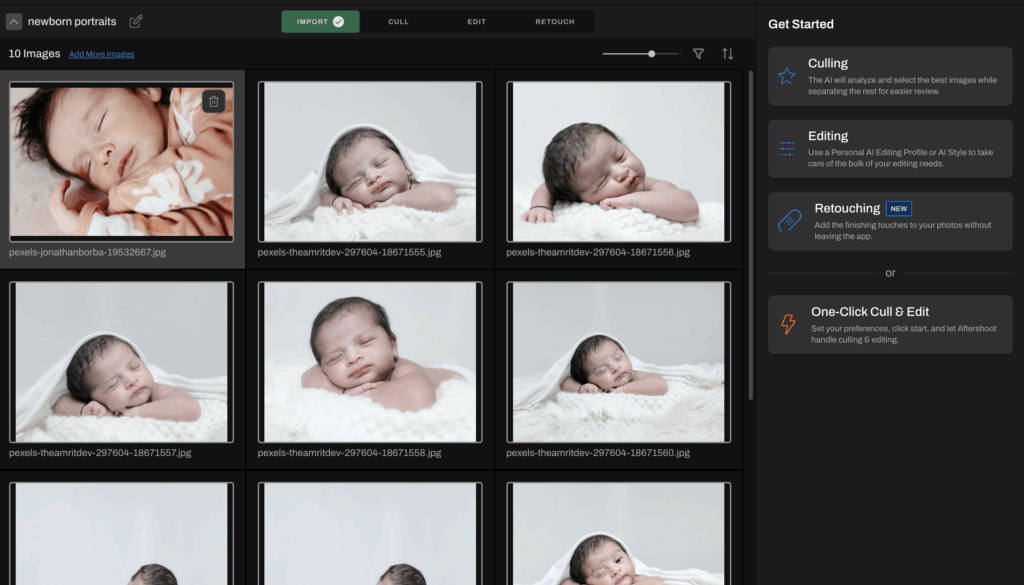
- Option A: Already using Aftershoot to cull and edit? Perfect. Just export your selects as JPEG or TIFF, then re-import them into Aftershoot Retouch.
- Option B: Working in Lightroom Classic? You’re covered. Select your photos, right-click, and choose “Edit in Aftershoot”. They’ll open up directly in Aftershoot
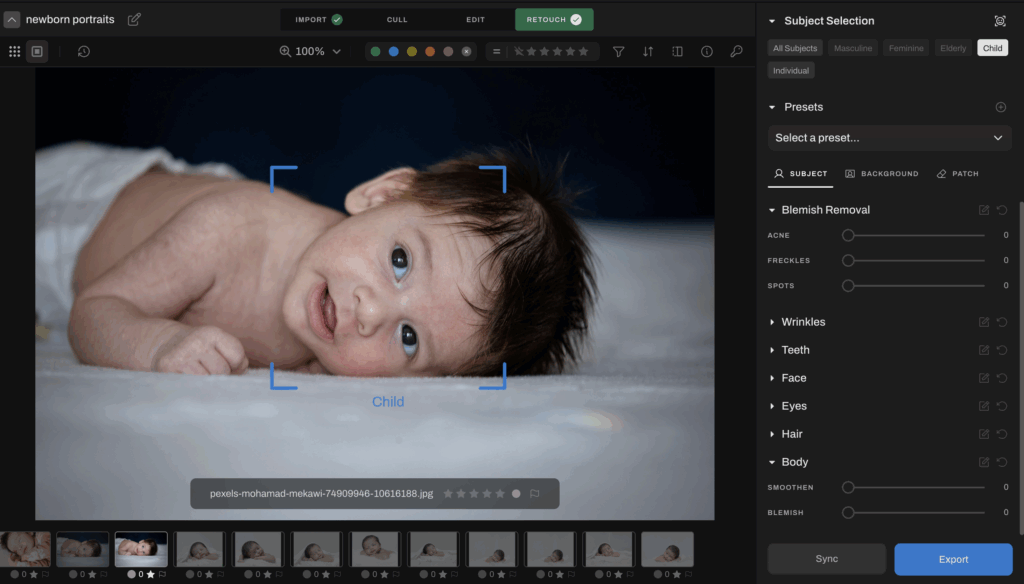
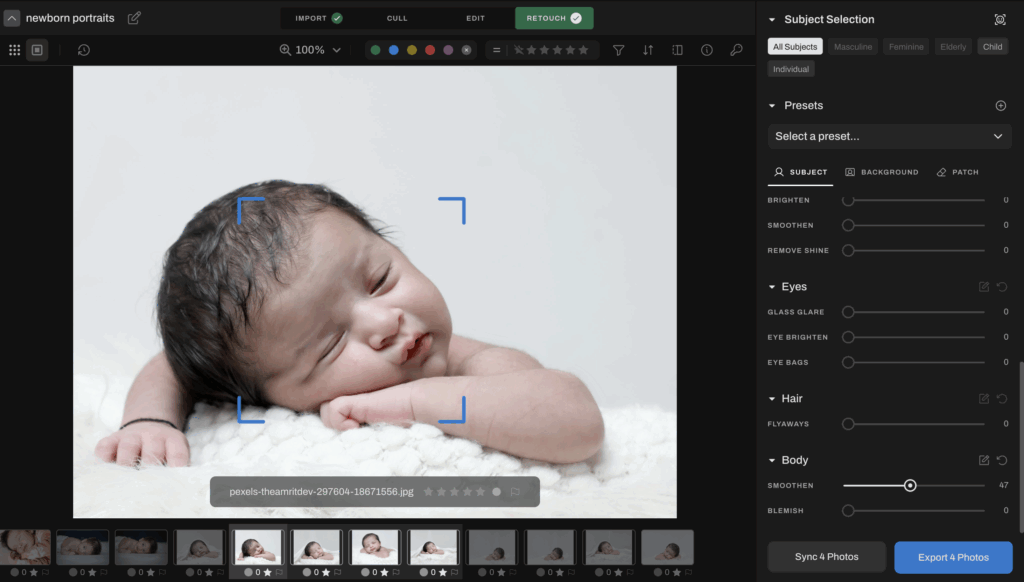
Step 2: Open the Retouch Tab
Once your images are loaded, head to the Retouch tab. On the right, you’ll find a powerful set of AI tools to help you get started. The tool is smart enough to retain real texture, so your baby still looks like… well, a baby.
- Use the skin slider to remove red spots, baby acne
- Use the body slider to remove redness from those baby hands, legs, etc.
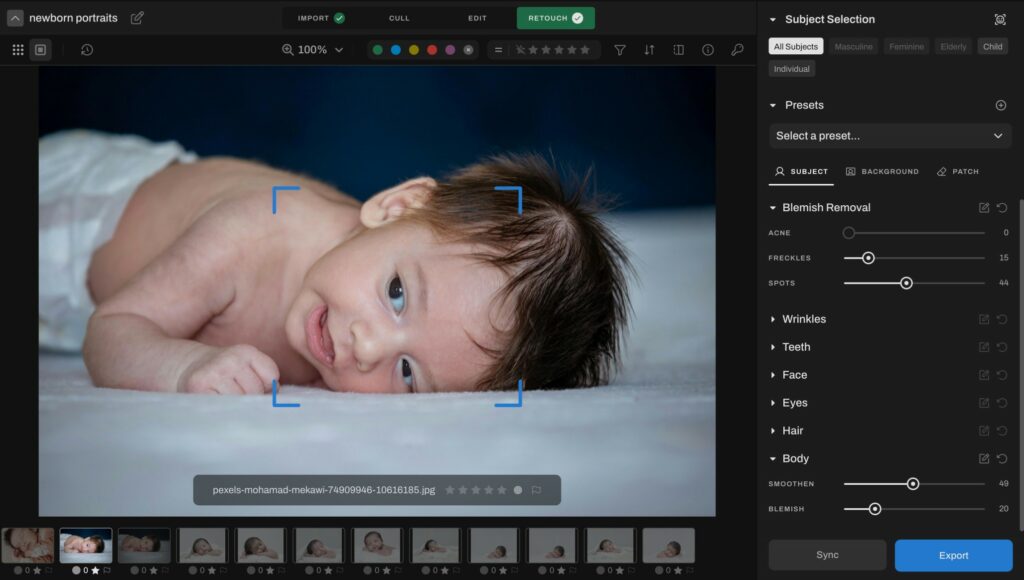
Bonus: Retouch by Age Group
Newborn skin isn’t the same as parents. Aftershoot lets you apply different settings by subject type (child, feminine, masculine, or elderly), so if you're shooting newborns with siblings or parents, you can customize retouching for each face in the frame.
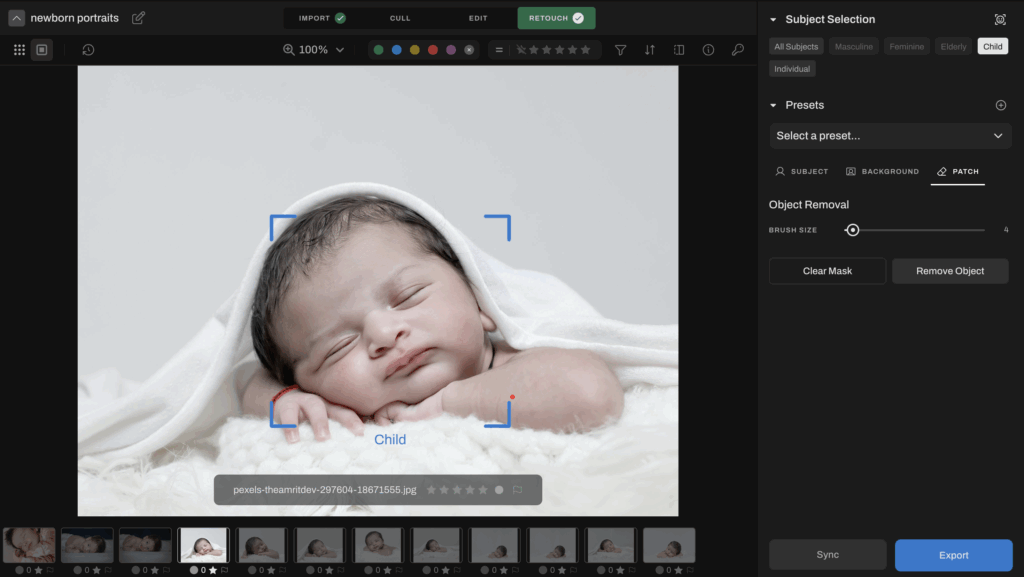
Step 3: Clean the Scene, Keep the Story
Babies are cute. The burp cloth in the background? Not so much.
Use the patch tool to remove distractions — stray props, wrinkled blankets, wipes, or anything else that snuck into your shot. This step is all about refining the frame while keeping the story intact.
Step 4: Sync Settings Across Your Gallery
If you’re retouching a series of similar setups (same blanket, pose, or lighting), you can sync your retouch settings and apply across the set. It’s especially handy for full-session galleries where you want consistency without redoing every adjustment.
And yes, you can still toggle before/after to see exactly what’s changed before you export.
Step 5: Export for Final Polish
Once your retouching is dialed in, export your files for finishing touches in Lightroom or Photoshop, wherever you apply your signature look.
With clean, natural skin and a distraction-free frame, you’ve got the perfect base to color grade, tone, or deliver straight to your client.
Retouch Faster, Deliver Better
Retouching newborn photos doesn’t have to mean late nights, endless sliders, or second guessing every skin adjustment.
With the right workflow and a little help from AI, you can keep things fast, consistent, and true to your style.
Ready to see it in action? Try Aftershoot’s AI Retouching for free. (Now in Early Release, Free Until this September)