The 7 Step Lightroom Workflow for Photographers
When you’re editing hundreds—often thousands—of photos after a wedding, having a reliable workflow in Lightroom is essential. As a London-based wedding photographer, I’ve developed (see what I did there) my process to balance efficiency and quality, ensuring my clients receive beautifully edited images without unnecessary delays.
Here, I’m about to share my Lightroom workflow for wedding photography. I have a streamlined process that gets my photos from camera to client quickly and consistently. While my focus is on weddings, the principles here can be applied to many genres of photography when you’re using Lightroom, such as family photography or commercial work.
Recently, I’ve also incorporated Aftershoot into my Lightroom workflow for culling and initial edits, making the process even faster without sacrificing quality. I’ll touch on this in more detail later in this blog.
Step 1: Importing Photos From Camera To Hard Drive
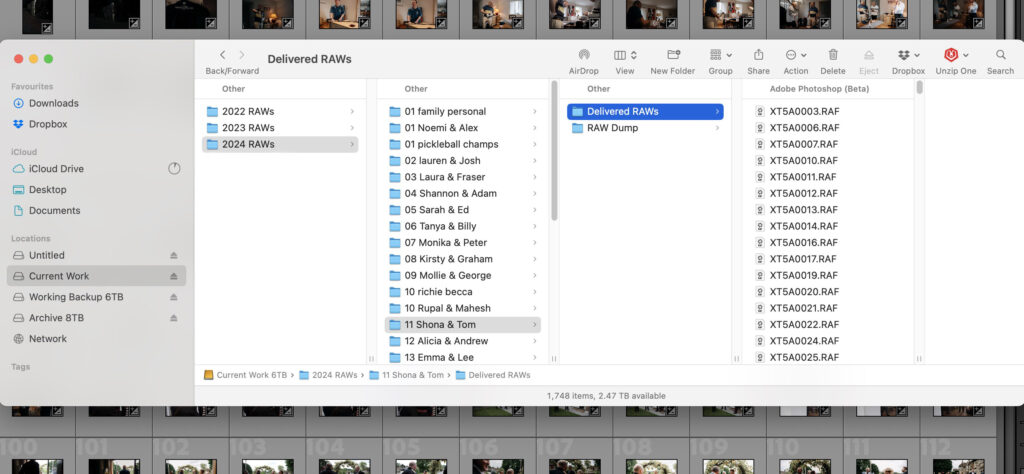
Every Lightroom workflow should start with organization. Before I even open Lightroom, I import all the photos from my camera onto my hard drive and sort them into a structured folder system. This simple habit ensures I can easily find files later, which is especially important when working on large wedding galleries.
My folder structure looks something like this:
YEAR > 01 COUPLE NAME > RAW DUMP
Having this hierarchy keeps things clear and manageable, whether I’m editing one wedding or several back-to-back. I put my photos in the RAW DUMP folder as I arrive home from a wedding. I copy all the images I will deliver to my client in a ‘delivered photos’ folder. These will be edited.
Back up your files as soon as they’re on your hard drive. I make it a point to save a copy on another external hard drive. These are also backed up to the cloud, just in case.
Note: If you’re new to photography, start with a basic folder structure and stick to it. A little organization goes a long way when you work with thousands of images.
Step 2: Importing Into Lightroom
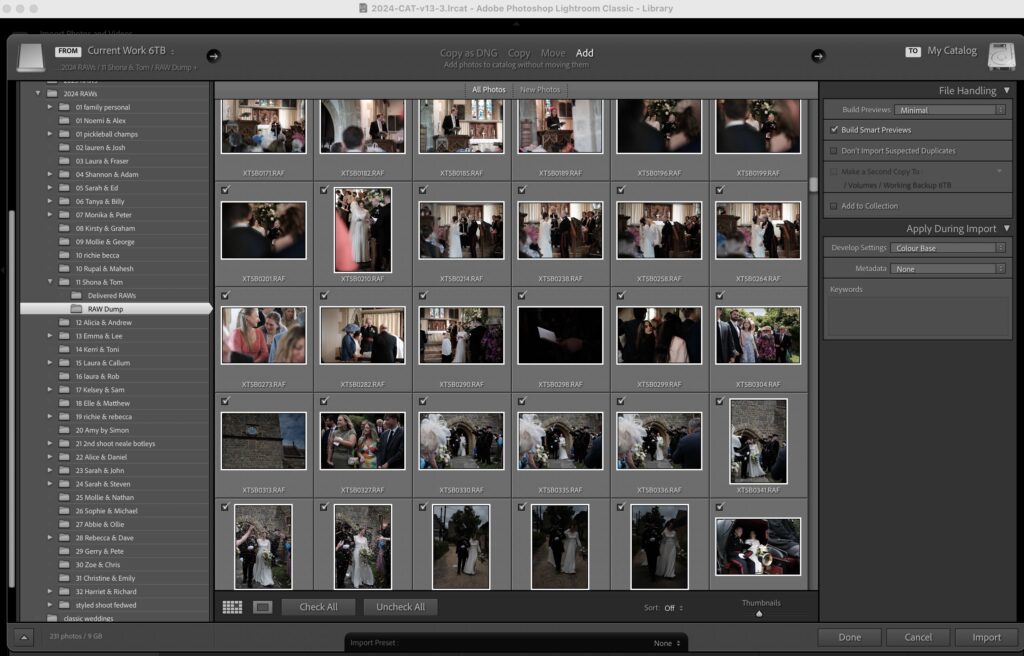
Once my files are sorted, I import them into Lightroom (A tip for Mac users- just drag the folder from the finder window, into the Lightroom icon in the dock). During this step, I apply my Lightroom wedding preset to all the images. This preset gives me a consistent base edit across the gallery and speeds up the overall editing process.
Presets are a game-changer for wedding photography, where lighting conditions vary from room to room and moment to moment. My preset is tailored to my style—natural tones, clean whites, and a timeless feel. You can create or customize your own to suit your aesthetic.
You can also use the “Apply During Import” panel in Lightroom to add metadata and keywords. This makes organizing and searching for images much easier later on.
Step 3: Culling in Lightroom
With all the photos imported, my next step is culling—sorting through the images to select the best ones for editing. For weddings, this is typically choosing the images that will go to the client, as well as my 2-star photos. These are the standout shots that capture the day’s story, and they’ll form the preview gallery I deliver to my clients.
You can choose to mark potential black-and-white candidates as you go, although I usually do this as I’m editing. I find that emotional, high-contrast moments often work best for monochrome.
Focus on consistency in your culling. Pick images that tell the story and avoid overthinking every choice—you can always refine as you gain experience.
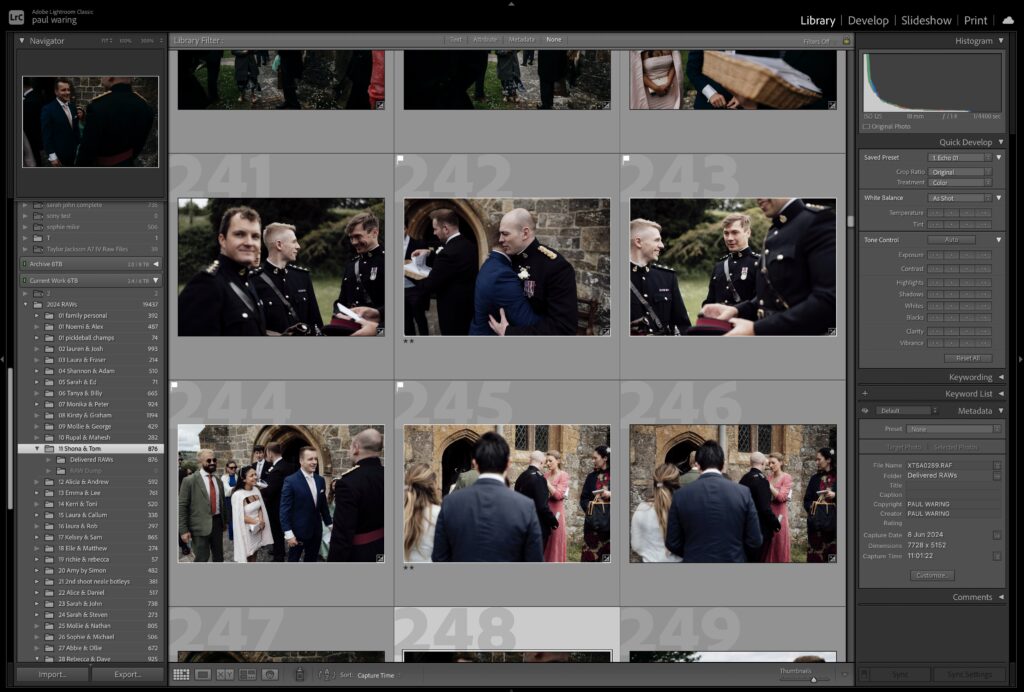
Check out my culling process in more detail here and learn how to cull in Lightroom efficiently.
Step 4: Editing Client Previews
After culling, I edit the selected previews to a polished, professional standard. These images are often the first glimpses my clients have of their wedding photos, so I focus on creating a cohesive and impactful set.
In Lightroom, I start with basic adjustments, including exposure, white balance, and contrast. These base edits ensure consistency across the gallery and provide a clean slate for more creative refinements.
Next, I move on to creative adjustments. This might involve fine-tuning the color grading to enhance the mood of a shot, subtly adjusting the tone curve for depth, or adding vignettes to draw attention to the subject. I also carefully review images to decide which ones work best in black and white. Emotional moments or scenes with tricky lighting often shine in monochrome.
For efficiency, I edit in batches. After applying base edits to one photo, I sync those settings across similar images to maintain consistency. I then tweak each image individually to ensure it looks its best.
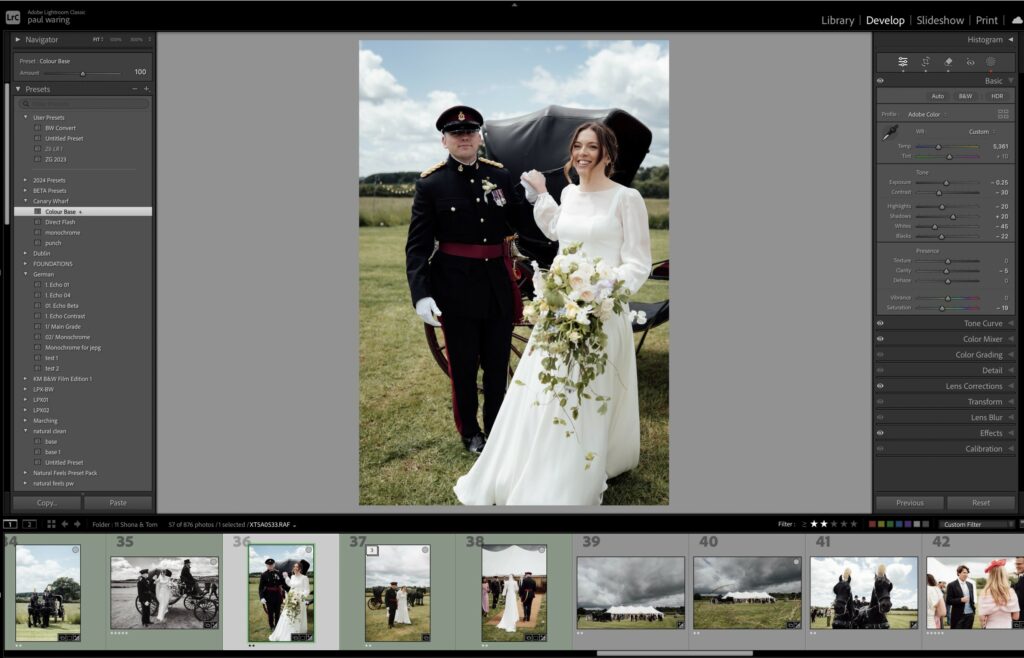
Note: Don’t over edit! Your photographs don’t need to look unnatural. If something doesn't look ‘right’, it’s often because the edit has been taken too far. Use the sliders in smaller actions.
Step 5: Exporting Client Previews
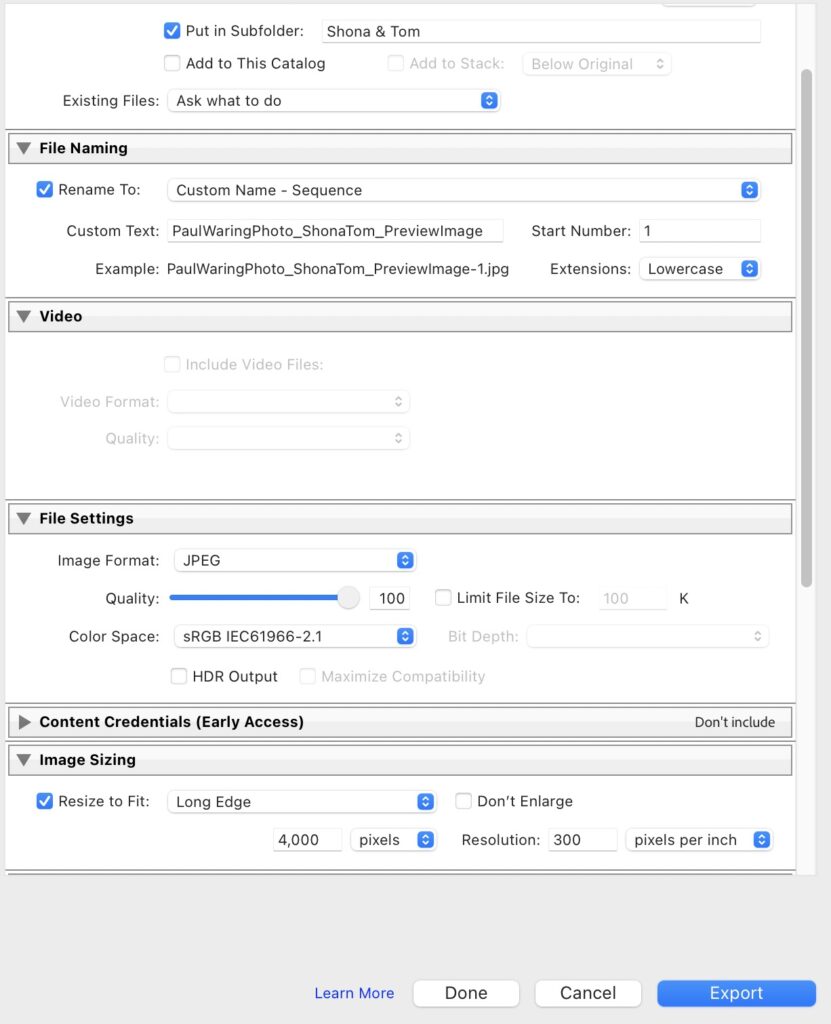
Once the client previews are edited, the next step is exporting the images. For my clients, I always export high-resolution files to ensure they receive the best possible quality.
In Lightroom, I use export settings tailored for print and digital use. This includes:
- File Format: JPEG
- Color Space: sRGB for compatibility across devices
- Resolution: 300 DPI for print-quality images
- Resize: 4000px (Long Edge)
I always export to a separate and new folder on my computer, with new file names. This is Usually PaulWaringPhoto_ClientName_PreviewImageNumber. This seems long, but will ultimately help everybody with the organization, as well as keeping my business name attached to images posted online.
This is where I will create the client/job account on my delivery software, and email my client with the exciting previews.
Step 6: Editing The Complete Gallery
The process of editing the complete gallery is similar to editing the client previews but on a larger scale. After the client previews are delivered, I move on to edit the entire set of images from the wedding day. This involves applying the same consistent style and adjustments across all photos, ensuring a cohesive gallery that reflects the entire day’s story.
Using my preset and editing techniques, I fine-tune the full set—adjusting exposure, color balance, and tone to create a polished, timeless look. Just like with the previews, I also decide which photos will benefit from being in black and white.
I work methodically through the gallery. Start with a small batch, applying edits uniformly, then move on to the next batch. This keeps the workflow smooth and prevents burnout from constant changes. It’s also advisable, at this point, to take lots of breaks. I usually try to give myself a few minutes away from my screen every hour or so.
Step 7: Final Exports and Deliveries
The final step in my Lightroom workflow is exporting and delivering the images to my clients. Throughout this process, my export settings remain consistent to ensure high-quality images for both digital and print use.
Pro Tip: Save export presets in Lightroom for different delivery options, such as web galleries or high-resolution files. This helps streamline the process.
Beginner Note: If you’re new to exporting, stick with high-resolution JPEG files for clients, and smaller resolution images for sharing online.
Using Aftershoot for AI-Assisted Culling & Editing
Recently, I’ve integrated Aftershoot into my Lightroom workflow. Aftershoot uses AI to quickly identify the best images from my shoots, narrowing down the selection to the sharpest, most impactful photos. This integration saves me countless hours of manual culling but ensures that I retain control over my selections.
Aftershoot then has the ability to apply my personal editing profile, based on my existing preset and images. The software applies basic edits—adjusting exposure, color, and tone—to get my photos very close to the final product. I review them and make any necessary adjustments in Lightroom to perfect them and finalize the gallery before going through the same export process above.
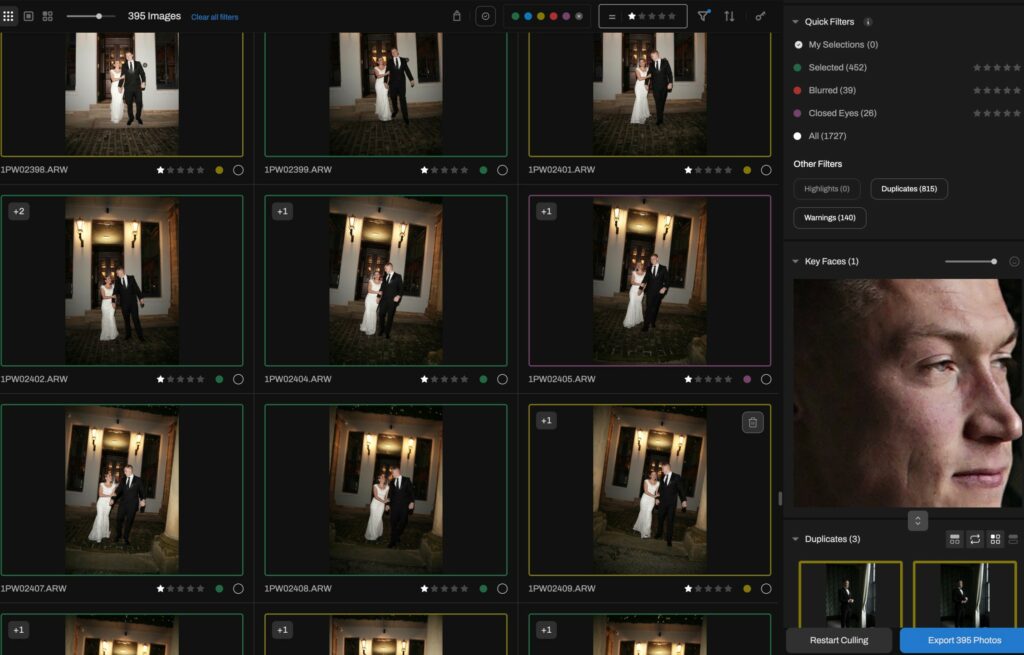
If you want to try Aftershoot (We have a no-obligation 30-day trial), experiment with the settings to understand how the AI applies edits. Adjust the preferences until you find the configuration that works best for you, and watch how the software streamlines your workflow like it has done for me.
Building an Efficient Lightroom Workflow
Whether you’re a professional or just starting in photography, applying a thoughtful workflow can streamline your editing process and improve the overall quality of your images. From the initial import to the final export, every step is about creating a seamless and enjoyable experience for both the photographer and the client.
Remember, the key to a great workflow for Lightroom is consistency and the ability to adapt. Experiment with your own process, learn from each shoot, and refine it over time. The result will be a more efficient workflow, higher quality images, and ultimately, more satisfied clients.
